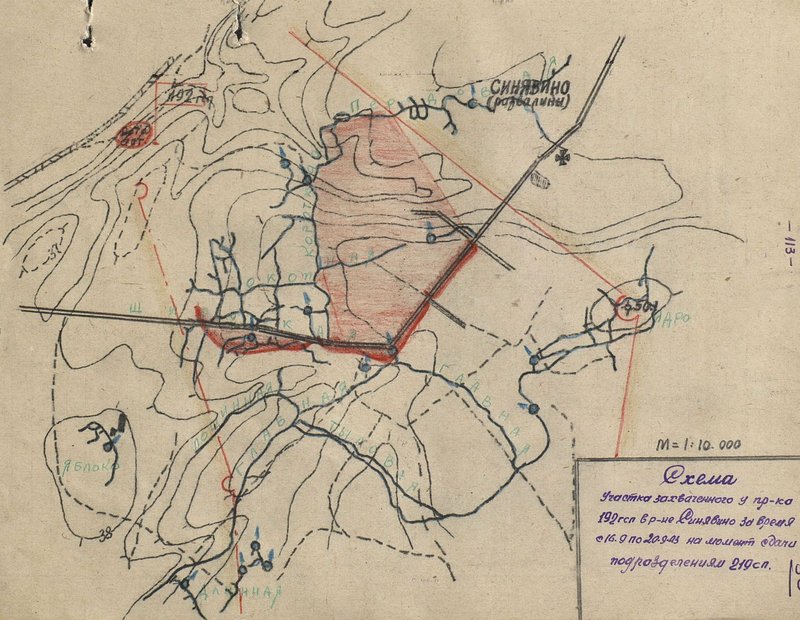
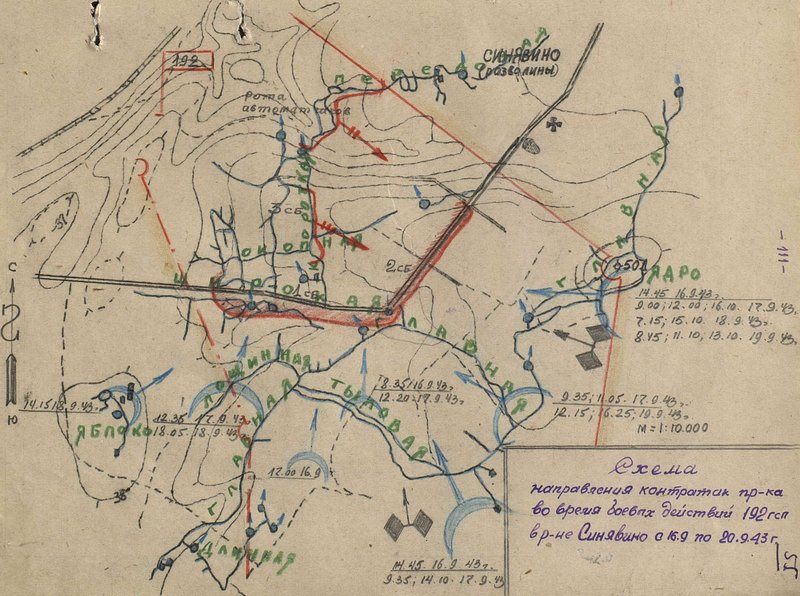
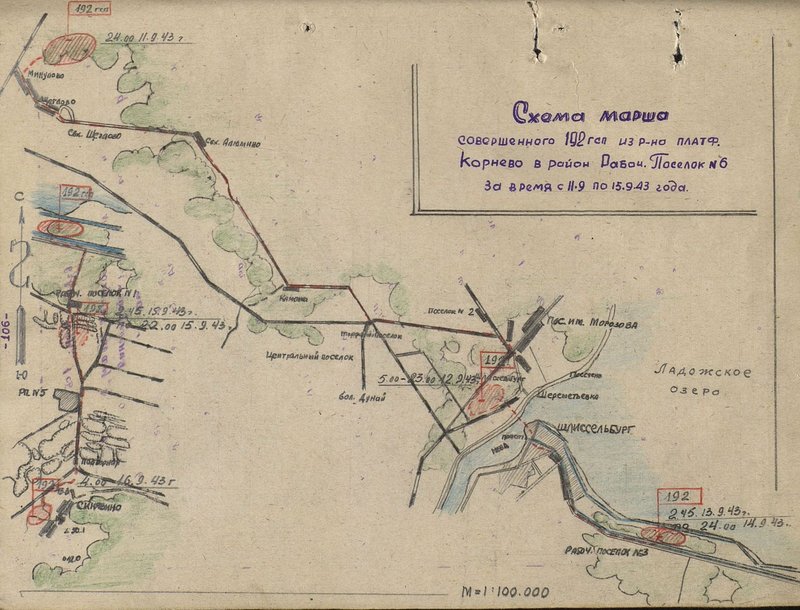
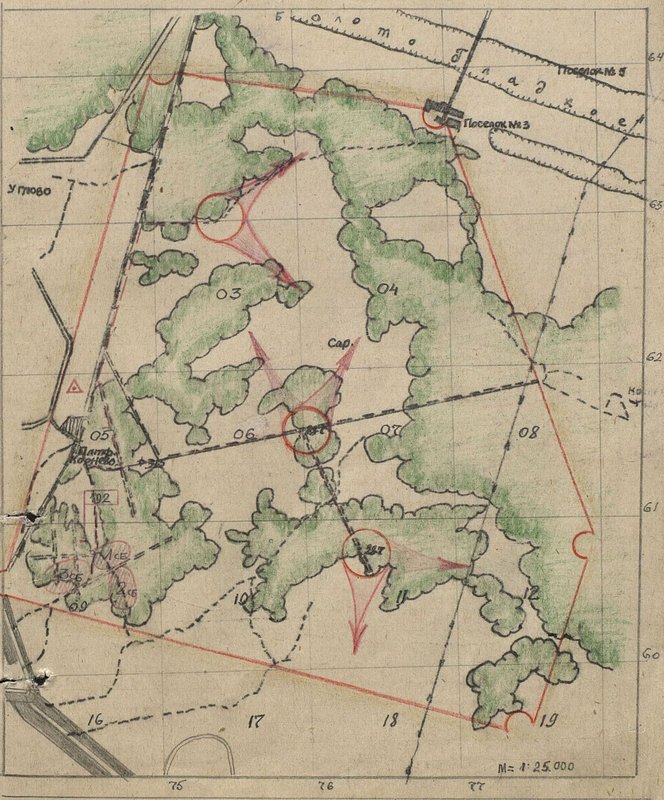
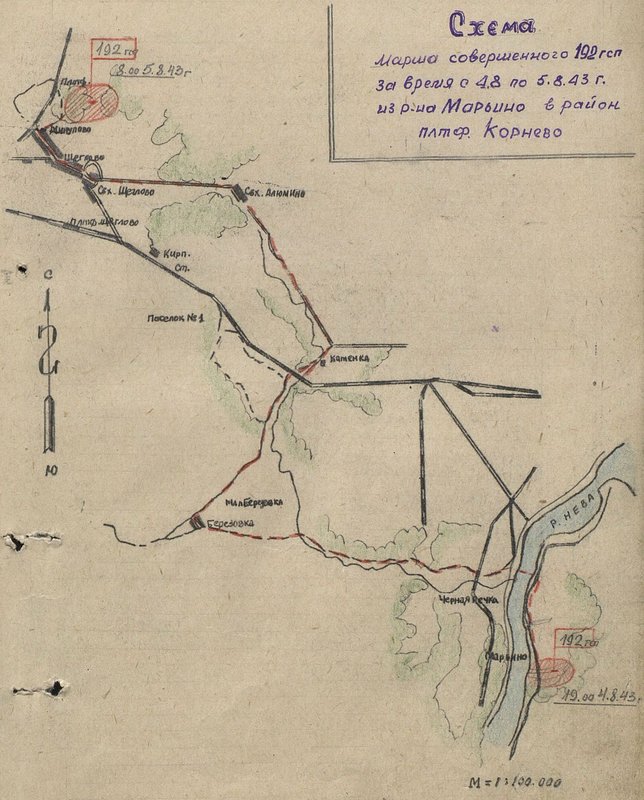
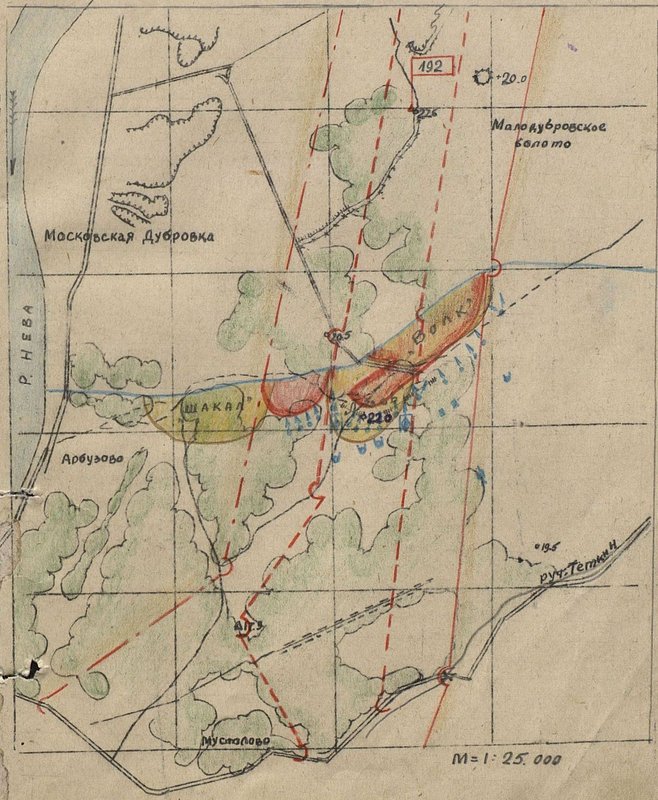
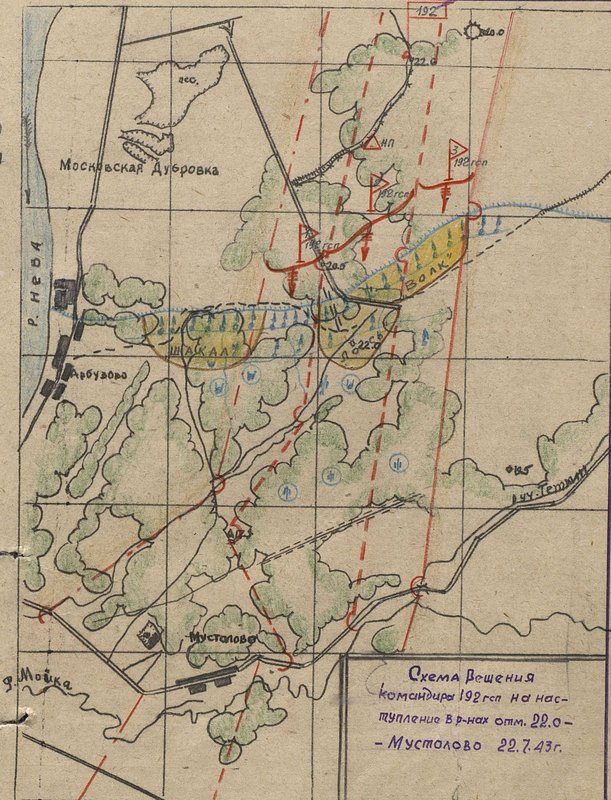
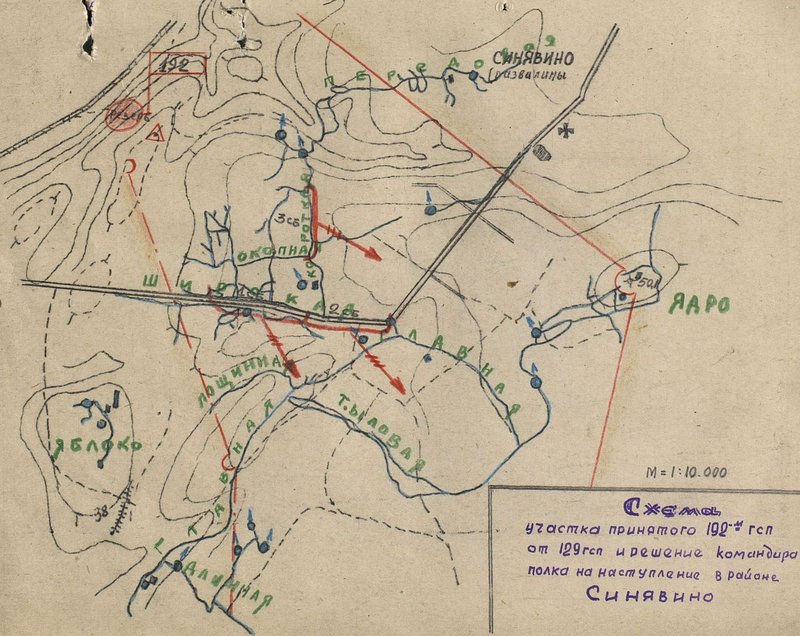
Image: Diagram of the section taken by the 192nd guards rifle regiment from the 129 guards rifle regiment and the decision of the regiment commander to attack in the Sinyavino area
Image: Diagram of the section taken by the 192nd guards rifle regiment from the 129 guards rifle regiment and the decision of the regiment commander to attack in the Sinyavino area
Image: Diagram of the section taken by the 192nd guards rifle regiment from the 129 guards rifle regiment and the decision of the regiment commander to attack in the Sinyavino area
Image: Diagram of the section taken by the 192nd guards rifle regiment from the 129 guards rifle regiment and the decision of the regiment commander to attack in the Sinyavino area
0 comment



2026 © Russian Military Historical Society Developed by Jetmix